HDR Overlay
G button UC photo shooting menu
Used with high contrast subjects,

| Option | Description |
|---|---|
| [HDR mode] |
|
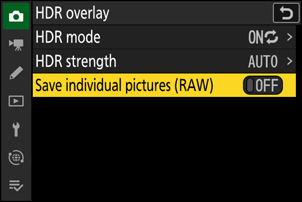
| [HDR strength] | Adjust HDR strength. If [Auto] is selected, the camera will automatically adjust HDR strength to suit the scene. |
| [Save individual pictures (RAW)] | Choose [ON] to save each of the individual shots used to create the HDR picture; the shots are saved in NEF (RAW) format. |
Taking HDR Photographs
We recommend that you use the matrix metering option when shooting with HDR.
Highlight [HDR overlay] in the photo shooting menu and press 2.
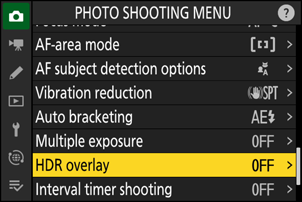
Select an [HDR mode].
- Highlight [HDR mode] and press 2.
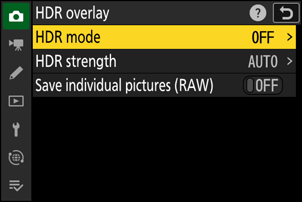
Highlight one of the following options using 1 or 3 and press J.
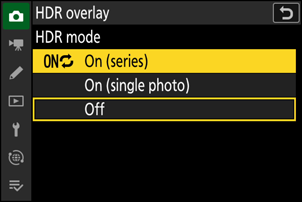
Option Description 0 [On (series)] Take a series of HDR photographs. HDR shooting will continue until you select [Off] for [HDR mode]. [On (single photo)] Normal shooting will resume after you have taken a single HDR photograph. [Off] Proceed without taking additional HDR photographs. If [On (series)] or [On (single photo)] is selected, an icon will appear in the display.

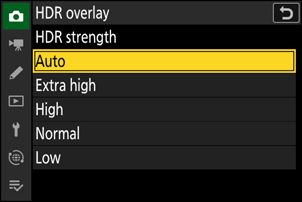
Choose an [HDR strength].
- Highlight [HDR strength] and press 2.

- Highlight an option using 1 or 3 and press J.
- If [Auto] is selected, the camera will automatically adjust HDR strength to suit the scene.
Choose a setting for [Save individual pictures (RAW)].
Choose [ON] to save each of the individual shots used to create the HDR picture; the shots are saved in NEF (RAW) format.
Frame the photograph, focus, and shoot.
- The camera takes two exposures when the shutter-release button is pressed all the way down.
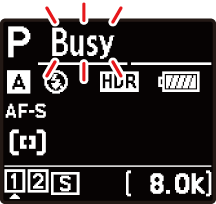
- “Busy” will flash in the control panel while the pictures are combined. No photographs can be taken until recording is complete.
- If [On (series)] is selected for [HDR mode], you can continue to take HDR photographs until [Off] is selected.
- If [On (single photo)] is selected, HDR will turn off automatically after a single shot.
- HDR photographs are recorded in JPEG format regardless of the option selected for image quality.
- The edges of the picture will be cropped out.
- The desired results may not be achieved if the camera or subject moves during shooting. Use of a tripod is recommended.
- Depending on the scene, you may notice shadows around bright objects or halos around dark objects. In other cases, the effect produced by HDR may not be particularly noticeable.
- Uneven shading may be visible with some subjects.
- When spot or center-weighted metering is selected, an [HDR strength] setting of [Auto] is equivalent to [Normal].
- Optional flash units will not fire.
- In continuous release modes, only one photograph will be taken each time the shutter-release button is pressed all the way down.
- Shutter speeds of “Bulb” and “Time” are not available.
HDR cannot be combined with some camera features, including:
- photo flicker reduction,
- high-speed frame capture +,
- bracketing,
- multiple exposures,
- interval-timer photography,
- time-lapse video recording, and
- focus shift.
