Choosing Special Effects
The following effects can be selected by rotating the mode dial to EFFECTS and rotating the main command dial until the desired option appears in the monitor.
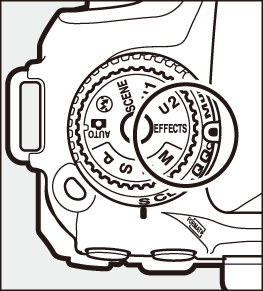
Mode dial
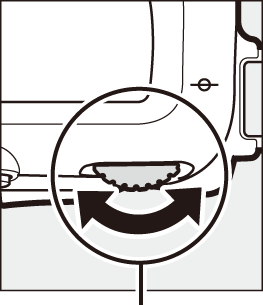
Main command dial
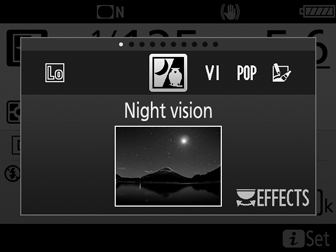
Monitor
Note that the effect can not be changed during movie recording.
Special Effects
The built-in flash turns off.
The AF-assist illuminator turns off.
Preventing Blur
Use a tripod to prevent blur caused by camera shake at slow shutter speeds.
NEF (RAW)
NEF (RAW) recording is not available in %, f, d, e, ', (, and u modes. Pictures taken when an NEF (RAW) or NEF (RAW) + JPEG option is selected in these modes will be recorded as JPEG images. JPEG images created at settings of NEF (RAW) + JPEG will be recorded at the selected JPEG quality, while images recorded at a setting of NEF (RAW) will be recorded as fine-quality images.
e and i Modes
Autofocus is not available during movie recording. The live view refresh rate will drop, together with the frame rate for continuous release mode; using autofocus during live view will disrupt the preview.
Options Available in Live View
Settings for the selected effect are adjusted in the live view display.
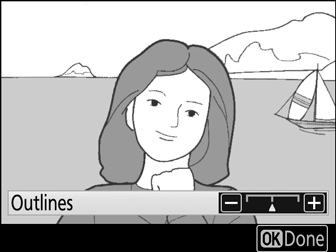
e Photo Illustration
-
Select live view.
Press the a button. The view through the lens will be displayed in the monitor.
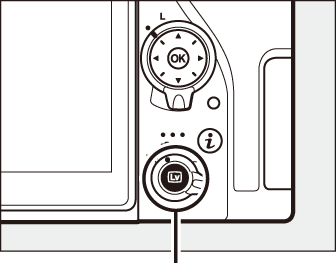
a button
-
Adjust outline thickness.
Press J to display options. Press 4 or 2 to make outlines thicker or thinner.
-
Press J.
Press J to exit when settings are complete.
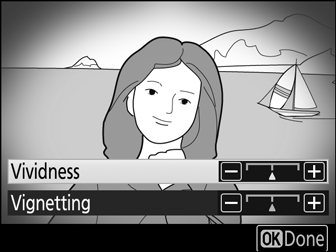
' Toy Camera Effect
-
Select live view.
Press the a button. The view through the lens will be displayed in the monitor.
a button
-
Adjust options.
Press J to display options. Press 1 or 3 to highlight Vividness or Vignetting and press 4 or 2 to change. Adjust vividness to make colors more or less saturated, vignetting to control the amount of vignetting.
-
Press J.
Press J to exit when settings are complete.
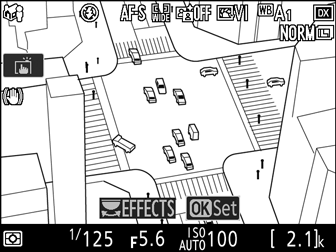
i Miniature Effect
-
Select live view.
Press the a button. The view through the lens will be displayed in the monitor.
a button
-
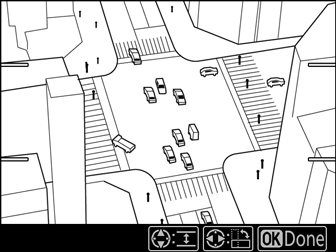
Position the focus point.
Use the multi selector to position the focus point in the area that will be in focus and then press the shutter-release button halfway to check focus. To temporarily clear miniature effect options from the display and enlarge the view in the monitor for precise focus, press X (T). Press W (Z) to restore the miniature effect display.
-
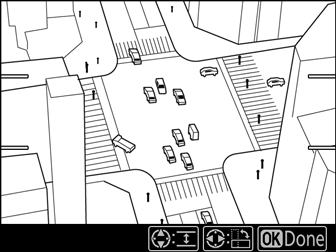
Display options.
Press J to display miniature effect options.
-
Adjust options.
Press 4 or 2 to choose the orientation of the area that will be in focus and press 1 or 3 to adjust its width.
-
Press J.
Press J to exit when settings are complete.
u Selective Color
-
Select live view.
Press the a button. The view through the lens will be displayed in the monitor.
a button
-
Display options.
Press J to display selective color options.
-
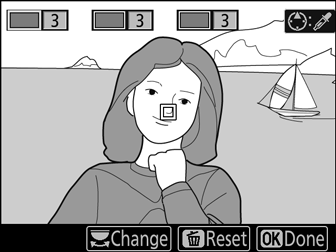
Select a color.
Frame an object in the white square in the center of the display and press 1 to choose the color of the object as one that will remain in the final image (the camera may have difficulty detecting unsaturated colors; choose a saturated color). To zoom in on the center of the display for more precise color selection, press X (T). Press W (Z) to zoom out.
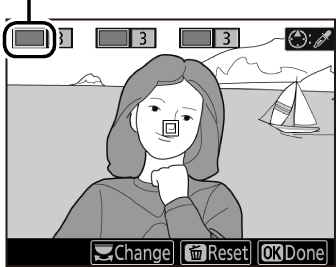
Selected color
-
Choose the color range.
Press 1 or 3 to increase or decrease the range of similar hues that will be included in the final image. Choose from values between 1 and 7; note that higher values may include hues from other colors.
Color range

-
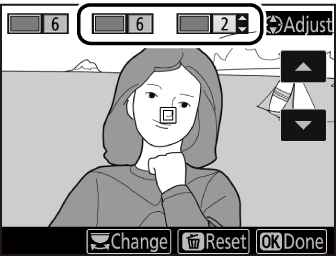
Select additional colors.
To select additional colors, rotate the main command dial to highlight another of the three color boxes at the top of the display and repeat Steps 3 and 4 to select another color. Repeat for a third color if desired. To deselect the highlighted color, press O (Q). To remove all colors, press and hold O (Q). A confirmation dialog will be displayed; select Yes.

-
Press J.
Press J to exit when settings are complete. During shooting, only objects of the selected hues will be recorded in color; all others will be recorded in black-and-white.