Choosing a Mode
Lens Types
When using a CPU lens equipped with an aperture ring (0 Recognizing CPU and Type G, E, and D Lenses), lock the aperture ring at the minimum aperture (highest f-number). Type G and E lenses are not equipped with an aperture ring.
Non-CPU lenses can only be used in mode M (manual), when aperture can only be adjusted using the lens aperture ring. Selecting any other mode disables the shutter release. For more information, see “Compatible Lenses” (0 Compatible Lenses).
- P: Programmed Auto
- S: Shutter-Priority Auto
- A: Aperture-Priority Auto
- M: Manual
- Long Time-Exposures (M Mode Only)
P: Programmed Auto
In this mode, the camera automatically adjusts shutter speed and aperture according to a built-in program to ensure optimal exposure in most situations.
Flexible Program
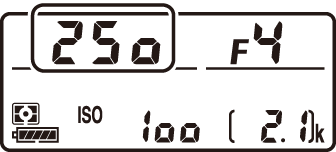
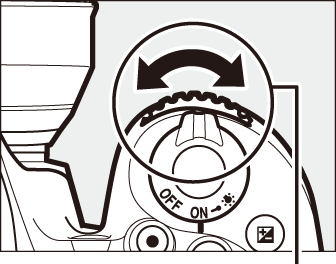
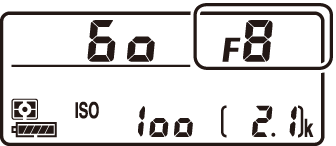
In mode P, different combinations of shutter speed and aperture can be selected by rotating the main command dial while the exposure meters are on (“flexible program”). Rotate the dial to the right for large apertures (low f-numbers) that blur background details or fast shutter speeds that “freeze” motion. Rotate the dial to the left for small apertures (high f-numbers) that increase depth of field or slow shutter speeds that blur motion. All combinations produce the same exposure. While flexible program is in effect, a flexible program indicator (O or E) is displayed. To restore default shutter speed and aperture settings, rotate the main command dial until the indicator is no longer displayed, choose another mode, or turn the camera off.

Main command dial

Viewfinder
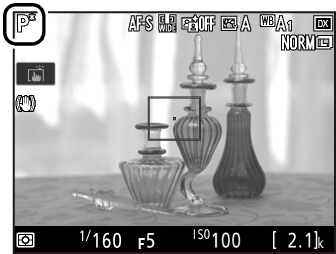
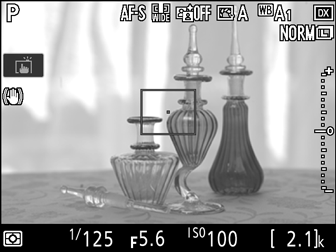
Monitor
See Also
For information on activating the exposure meters, see “The Standby Timer (Viewfinder Photography)” (0 The Standby Timer (Viewfinder Photography)).
S: Shutter-Priority Auto
In shutter-priority auto, you choose the shutter speed while the camera automatically selects the aperture that will produce the optimal exposure.
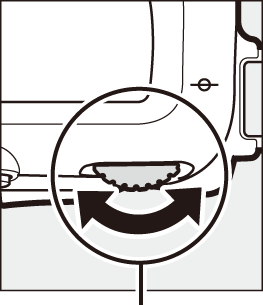
To choose a shutter speed, rotate the main command dial while the exposure meters are on. Shutter speed can be set to “v” or to values between 30 s and 1/8000 s.
Main command dial
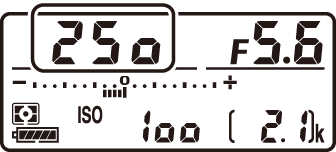
Control panel

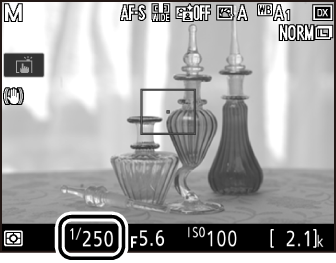
Monitor
See Also
For information on what to do if a flashing “A” (“Bulb”) or “%” (“Time”) indicator appears in the shutter-speed displays, see “Error Messages” (0 Error Messages).
A: Aperture-Priority Auto
In aperture-priority auto, you choose the aperture while the camera automatically selects the shutter speed that will produce the optimal exposure.
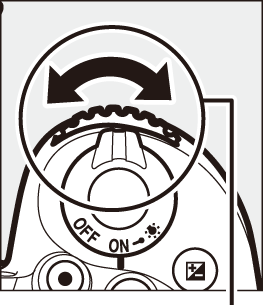
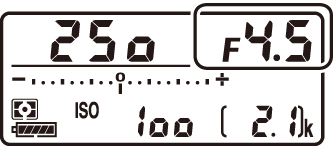
To choose an aperture between the minimum and maximum values for the lens, rotate the sub-command dial while the exposure meters are on.
Sub-command dial
Control panel
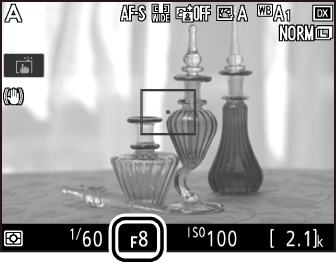
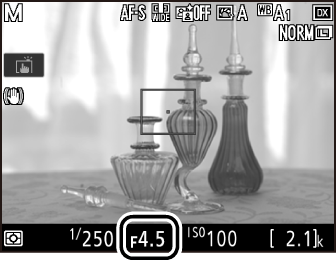
Monitor
Beeps During Live View
A beep may sound if you adjust aperture, use the live view selector, or rotate the mode dial during live view. This does not indicate an error or malfunction.
M: Manual
In manual exposure mode, you control both shutter speed and aperture. While the exposure meters are on, rotate the main command dial to choose a shutter speed, and the sub-command dial to set aperture. Shutter speed can be set to “v” or to values between 30 s and 1/8000 s, or the shutter can be held open indefinitely for a long time-exposure (A or %, 0 Long Time-Exposures (M Mode Only)). Aperture can be set to values between the minimum and maximum values for the lens. Use the exposure indicators to check exposure.
Aperture:
Sub-command dial

Shutter speed:
Main command dial

AF Micro NIKKOR Lenses
Provided that an external exposure meter is used, the exposure ratio need only be taken into account when the lens aperture ring is used to set aperture.
The Exposure Indicators
If a shutter speed other than “bulb” or “time” is selected, the exposure indicators show whether the photograph would be under- or over-exposed at current settings. Depending on the option chosen for Custom Setting b2 (EV steps for exposure cntrl, 0 EV Steps for Exposure Cntrl), the amount of under- or over-exposure is shown in increments of 1/3 EV or 1/2 EV. If the limits of the exposure metering system are exceeded, the displays will flash.
| Custom Setting b2 set to 1/3 step | |||
|---|---|---|---|
| Optimal exposure | Underexposed by 1/3 EV | Overexposed by 2 EV | |
| Control panel |  |
 |
 |
| Viewfinder (viewfinder photography) |  |
 |
 |
| Monitor (live view) |  |
 |
 |
Beeps During Live View
A beep may sound if you adjust aperture, use the live view selector, or rotate the mode dial during live view. This does not indicate an error or malfunction.
Exposure Preview
In modes P, S, A, and M, you can use live view to preview how changes to shutter speed, aperture, and ISO sensitivity will affect exposure: simply press the i button and select On for Exposure preview (note that although exposure compensation can be set to values between –5 and +5 EV, only values between –3 and +3 can be previewed in the monitor). Exposure preview is unavailable at shutter speeds of A (bulb) and % (time), while the preview may not accurately reflect the final result during bracketing, at a shutter speed of v, when exposure preview is used with Active D-Lighting (0 Active D-Lighting) or HDR (high dynamic range; 0 High Dynamic Range (HDR)), when A (auto) is selected for the Picture Control Contrast parameter (0 Picture Control Settings), or when the built-in flash is used or an optional flash unit is attached. If the subject is very bright or very dark, exposure may not be accurately reflected in the display and the exposure indicator will flash.
See Also
For information on reversing the exposure indicators so that negative values are displayed on the right and positive values on the left, see A > Custom Setting f5 (Reverse indicators, 0 Reverse Indicators).
Long Time-Exposures (M Mode Only)
Select the following shutter speeds for long time-exposures of moving lights, the stars, night scenery, or fireworks.
- Bulb (A): The shutter remains open while the shutter-release button is held down. To prevent blur, use a tripod or an optional wireless remote controller (0 Other Accessories) or remote cord (0 Other Accessories).
- Time (%): Start the exposure using the shutter-release button on the camera or on an optional remote control, remote cord, or wireless remote controller. The shutter remains open until the button is pressed a second time.
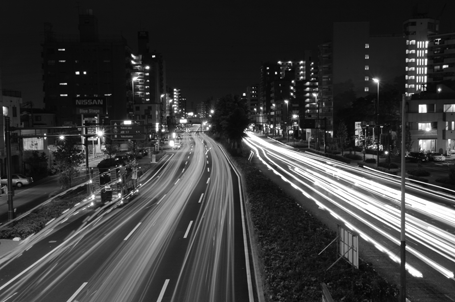
Shutter speed: A (35-second exposure)
Aperture: f/25
Before proceeding, mount the camera on a tripod or place it on a stable, level surface. To prevent light entering via the viewfinder from appearing in the photograph or interfering with exposure, remove the rubber eyecup and cover the viewfinder with the supplied eyepiece cap (0 Cover the Viewfinder). Nikon recommends using a fully charged battery or an optional AC adapter and power connector to prevent loss of power while the shutter is open. Note that noise (bright spots, randomly-spaced bright pixels, or fog) may be present in long exposures. Bright spots and fog can be reduced by choosing On for Long exposure NR in the photo shooting menu (0 Long Exposure NR (Long Exposure Noise Reduction)).
Bulb
-
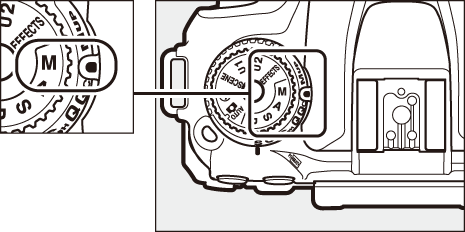
Rotate the mode dial to M.
Mode dial
-
Choose the shutter speed.
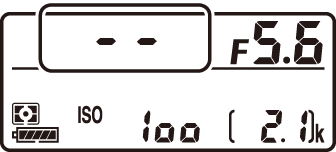
While the exposure meters are on, rotate the main command dial to choose a shutter speed of “Bulb” (A).
Main command dial
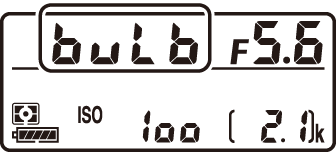
Control panel
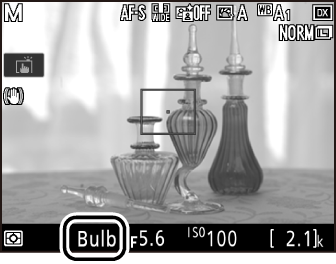
Monitor
-
Take the photograph.
After focusing, press the shutter-release button on the camera or on the optional wireless remote controller or remote cord all the way down. Remove your finger from the shutter-release button when the exposure is complete.
Time
-
Rotate the mode dial to M.
Mode dial
-
Choose the shutter speed.
While the exposure meters are on, rotate the main command dial left to choose a shutter speed of “Time” (%).
Main command dial
Control panel

Monitor
-
Open the shutter.
After focusing, press the shutter-release button on the camera or optional remote control, remote cord, or wireless remote controller all the way down.
-
Close the shutter.
Repeat the operation performed in Step 3.
ML-L3 Remote Controls
If you will be using an ML-L3 remote control, select a remote control mode (Delayed remote, Quick-response remote, or Remote mirror-up) using the Remote control mode (ML-L3) option in the photo shooting menu (0 Using an Optional ML-L3 Remote Control). Note that if you are using an ML-L3 remote control, pictures will be taken in “Time” mode even when “Bulb”/A is selected for shutter speed. The exposure starts when the shutter-release button on the remote control is pressed and ends after 30 minutes or when the button is pressed again.