FV Lock
This feature is used to lock flash output, allowing photographs to be recomposed without changing the flash level and ensuring that flash output is appropriate to the subject even when the subject is not positioned in the center of the frame. Flash output is adjusted automatically for any changes in ISO sensitivity and aperture.
To use FV lock:
-
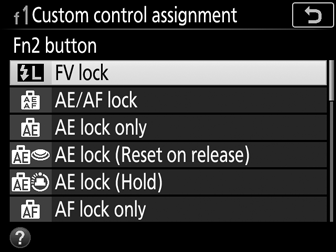
Assign FV lock to a camera control.
Assign FV lock to a control using Custom Setting f1 (Custom control assignment, 0 Custom Control Assignment).
-
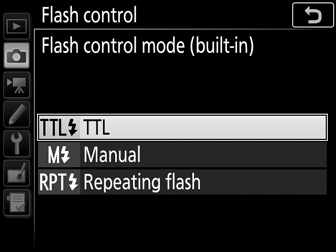
Select TTL flash control.
Select TTL for Flash control > Flash control mode (built-in) in the photo shooting menu.
-
Raise the flash.
In P, S, A, M, and 0 modes, the flash can be raised by pressing the M (Y) button. In i, k, p, n, o, s, w, f, d, e, and ' modes, the flash will pop up automatically when required.
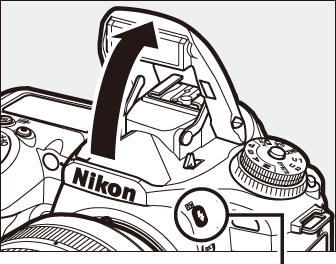
M (Y) button
-
Focus.
Position the subject in the center of the frame and press the shutter-release button halfway to focus.


-
Lock flash level.
After confirming that the flash-ready indicator (M) is displayed, press the control selected in Step 1. The flash will emit a monitor preflash to determine the appropriate flash level. Flash output will be locked at this level and an FV lock icon (e) will appear in the display.

-
Recompose the photograph.

-
Take the photograph.
Press the shutter-release button the rest of the way down to shoot. If desired, additional pictures can be taken without releasing FV lock.
-
Release FV lock.
Press the control selected in Step 1 to release FV lock. Confirm that the FV lock icon (e) is no longer displayed.
Metering
When the built-in flash is used without an external flash unit, the metering area for FV lock is confined to a 4-mm circle in the center of the frame. When the built-in flash is used as a master flash controlling remote flash units, the camera meters the entire frame.